Unity 向けエンドレス ランナー チュートリアル
ビデオゲームでは、世界がどれだけ大きくても、必ず終わりがあります。しかし、無限の世界を模倣しようとするゲームもあり、そのようなゲームは Endless Runner と呼ばれるカテゴリに分類されます。
エンドレス ランナーは、プレイヤーがポイントを集め、障害物を避けながら常に前進するタイプのゲームです。主な目的は、障害物に落ちたり衝突したりせずにレベルの最後まで到達することですが、多くの場合、レベルは無限に繰り返され、プレイヤーが障害物に衝突するまで徐々に難易度が上がります。

現代のコンピューターやゲーム機器でさえ処理能力に限界があることを考えると、真に無限の世界を作ることは不可能です。
では、一部のゲームではどのようにして無限の世界の錯覚を作り出すのでしょうか。その答えは、ビルディング ブロックを再利用することです (オブジェクト プーリングとも呼ばれます)。言い換えると、ブロックがカメラ ビューの背後または外側に移動するとすぐに、ブロックは前面に移動します。
Unity でエンドレスランナーゲームを作成するには、障害物とプレイヤーコントローラーを備えたプラットフォームを作成する必要があります。
ステップ1: プラットフォームを作成する
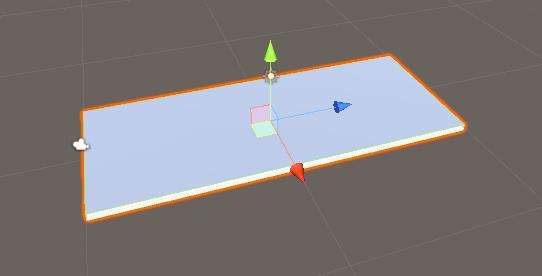
まず、後で Prefab に保存されるタイル状のプラットフォームを作成します。
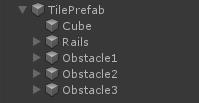
- 新しいGameObjectを作成し、それを呼び出します "TilePrefab"
- 新しいキューブを作成する (ゲームオブジェクト -> 3D オブジェクト -> キューブ)
- Cubeを"TilePrefab"オブジェクト内に移動し、位置を(0, 0, 0)に変更し、スケールを(8, 0.4, 20)に変更します。
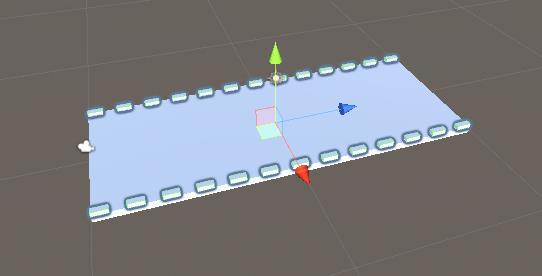
- オプションで、次のように追加のキューブを作成して、側面にレールを追加できます。
障害物については、3 つの障害物のバリエーションを用意しますが、必要に応じていくつでも作成できます。
- "TilePrefab"オブジェクト内に3つのゲームオブジェクトを作成し、"Obstacle1"、"Obstacle2"、および "Obstacle3"
- 最初の障害物として、新しいキューブを作成し、それを"Obstacle1"オブジェクト内に移動します。
- 新しいキューブをプラットフォームとほぼ同じ幅に拡大し、高さを小さくします(プレイヤーはこの障害物を避けるためにジャンプする必要があります)
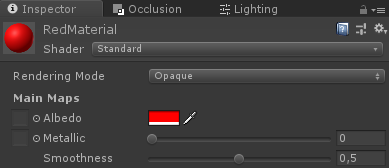
- 新しいマテリアルを作成し、"RedMaterial" という名前を付けて色を赤に変更し、キューブに割り当てます (これは、障害物をメイン プラットフォームと区別するためです)

- "Obstacle2" では、立方体をいくつか作成し、三角形に配置して、下部に 1 つの空きスペースを残します (プレイヤーはこの障害物を避けるためにしゃがむ必要があります)
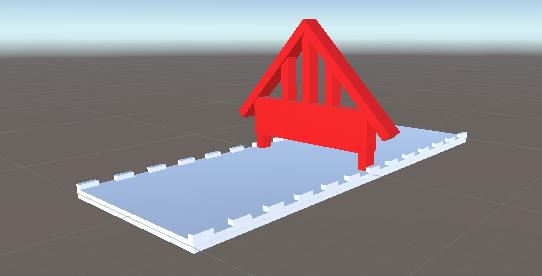
- そして最後に、"Obstacle3"は"Obstacle1"と"Obstacle2"を複製したものになります。

- 次に、障害物内のすべてのオブジェクトを選択し、そのタグを "Finish" に変更します。これは、後でプレーヤーと障害物間の衝突を検出するために必要になります。
無限プラットフォームを生成するには、オブジェクト プーリングと障害物のアクティブ化を処理するスクリプトがいくつか必要になります。
- 新しいスクリプトを作成し、"SC_PlatformTile" という名前を付けて、その中に以下のコードを貼り付けます。
SC_プラットフォームタイル.cs
using System.Collections;
using System.Collections.Generic;
using UnityEngine;

public class SC_PlatformTile : MonoBehaviour
{
    public Transform startPoint;
    public Transform endPoint;
    public GameObject[] obstacles; //Objects that contains different obstacle types which will be randomly activated

    public void ActivateRandomObstacle()
    {
        DeactivateAllObstacles();

        System.Random random = new System.Random();
        int randomNumber = random.Next(0, obstacles.Length);
        obstacles[randomNumber].SetActive(true);
    }

    public void DeactivateAllObstacles()
    {
        for (int i = 0; i < obstacles.Length; i++)
        {
            obstacles[i].SetActive(false);
        }
    }
}- 新しいスクリプトを作成し、"SC_GroundGenerator" という名前を付けて、その中に以下のコードを貼り付けます。
SC_グラウンドジェネレーター.cs
using System.Collections;
using System.Collections.Generic;
using UnityEngine;
using UnityEngine.SceneManagement;

public class SC_GroundGenerator : MonoBehaviour
{
    public Camera mainCamera;
    public Transform startPoint; //Point from where ground tiles will start
    public SC_PlatformTile tilePrefab;
    public float movingSpeed = 12;
    public int tilesToPreSpawn = 15; //How many tiles should be pre-spawned
    public int tilesWithoutObstacles = 3; //How many tiles at the beginning should not have obstacles, good for warm-up

    List<SC_PlatformTile> spawnedTiles = new List<SC_PlatformTile>();
    int nextTileToActivate = -1;
    [HideInInspector]
    public bool gameOver = false;
    static bool gameStarted = false;
    float score = 0;

    public static SC_GroundGenerator instance;

    // Start is called before the first frame update
    void Start()
    {
        instance = this;

        Vector3 spawnPosition = startPoint.position;
        int tilesWithNoObstaclesTmp = tilesWithoutObstacles;
        for (int i = 0; i < tilesToPreSpawn; i++)
        {
            spawnPosition -= tilePrefab.startPoint.localPosition;
            SC_PlatformTile spawnedTile = Instantiate(tilePrefab, spawnPosition, Quaternion.identity) as SC_PlatformTile;
            if(tilesWithNoObstaclesTmp > 0)
            {
                spawnedTile.DeactivateAllObstacles();
                tilesWithNoObstaclesTmp--;
            }
            else
            {
                spawnedTile.ActivateRandomObstacle();
            }

            spawnPosition = spawnedTile.endPoint.position;
            spawnedTile.transform.SetParent(transform);
            spawnedTiles.Add(spawnedTile);
        }
    }

    // Update is called once per frame
    void Update()
    {
        // Move the object upward in world space x unit/second.
        //Increase speed the higher score we get
        if (!gameOver && gameStarted)
        {
            transform.Translate(-spawnedTiles[0].transform.forward * Time.deltaTime * (movingSpeed + (score/500)), Space.World);
            score += Time.deltaTime * movingSpeed;
        }

        if (mainCamera.WorldToViewportPoint(spawnedTiles[0].endPoint.position).z < 0)
        {
            //Move the tile to the front if it's behind the Camera
            SC_PlatformTile tileTmp = spawnedTiles[0];
            spawnedTiles.RemoveAt(0);
            tileTmp.transform.position = spawnedTiles[spawnedTiles.Count - 1].endPoint.position - tileTmp.startPoint.localPosition;
            tileTmp.ActivateRandomObstacle();
            spawnedTiles.Add(tileTmp);
        }

        if (gameOver || !gameStarted)
        {
            if (Input.GetKeyDown(KeyCode.Space))
            {
                if (gameOver)
                {
                    //Restart current scene
                    Scene scene = SceneManager.GetActiveScene();
                    SceneManager.LoadScene(scene.name);
                }
                else
                {
                    //Start the game
                    gameStarted = true;
                }
            }
        }
    }

    void OnGUI()
    {
        if (gameOver)
        {
            GUI.color = Color.red;
            GUI.Label(new Rect(Screen.width / 2 - 100, Screen.height / 2 - 100, 200, 200), "Game Over\nYour score is: " + ((int)score) + "\nPress 'Space' to restart");
        }
        else
        {
            if (!gameStarted)
            {
                GUI.color = Color.red;
                GUI.Label(new Rect(Screen.width / 2 - 100, Screen.height / 2 - 100, 200, 200), "Press 'Space' to start");
            }
        }


        GUI.color = Color.green;
        GUI.Label(new Rect(5, 5, 200, 25), "Score: " + ((int)score));
    }
}- SC_PlatformTile スクリプトを オブジェクトにアタッチします
- "Obstacle1"、"Obstacle2"、"Obstacle3" オブジェクトを Obstacles 配列に割り当てる
開始ポイントと終了ポイントについては、それぞれプラットフォームの開始と終了に配置する 2 つの GameObject を作成する必要があります。

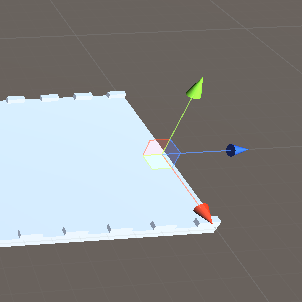
- SC_PlatformTileに開始点と終了点の変数を割り当てる

- "TilePrefab"オブジェクトをプレハブに保存し、シーンから削除します。
- 新しいGameObjectを作成し、それを呼び出します "_GroundGenerator"
- SC_GroundGeneratorスクリプトを"_GroundGenerator"オブジェクトにアタッチします。
- メインカメラの位置を(10, 1, -9)に変更し、回転を(0, -55, 0)に変更します。
- 新しいゲームオブジェクトを作成し、"StartPoint"という名前を付け、位置を(0, -2, -15)に変更します。
- "_GroundGenerator"オブジェクトを選択し、SC_GroundGeneratorでメインカメラ、開始点、タイルプレハブ変数を割り当てます。
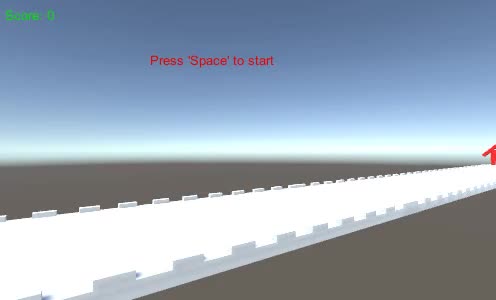
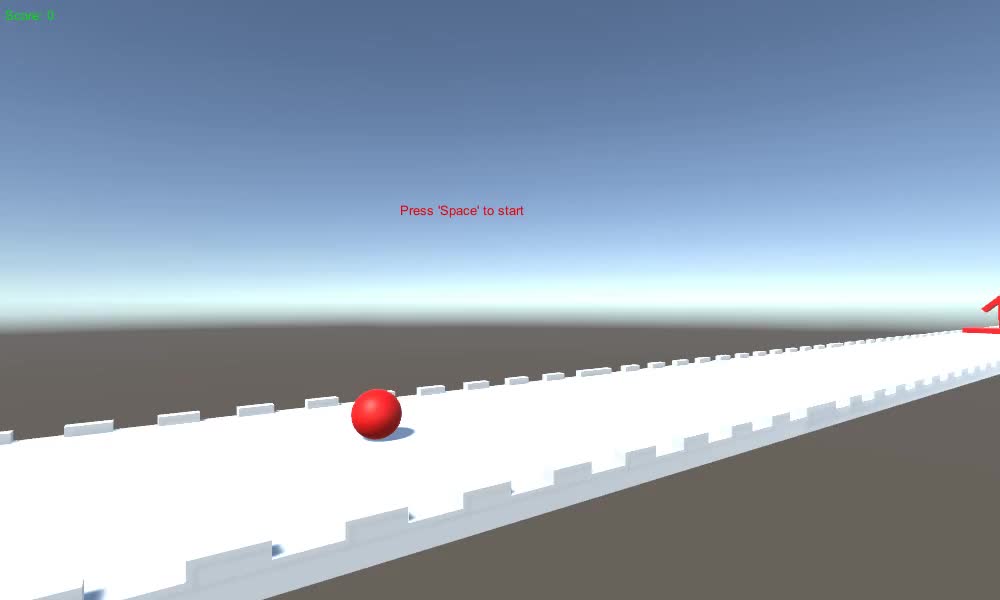
次に、[再生] を押して、プラットフォームがどのように動くか観察します。プラットフォーム タイルがカメラ ビューから外れるとすぐに、ランダムな障害物がアクティブ化されて端まで移動し、無限レベルのような錯覚を作り出します (0:11 にスキップ)。
カメラはビデオと同じように配置する必要があります。プラットフォームはカメラに向かってカメラの後ろに移動します。そうしないと、プラットフォームは繰り返されません。
ステップ2: プレーヤーを作成する
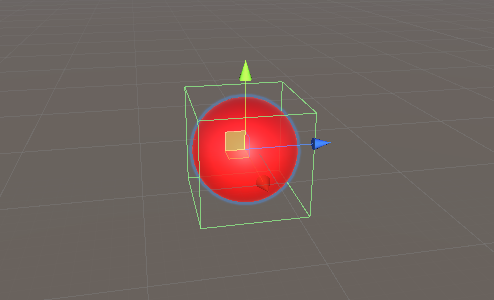
プレイヤー インスタンスは、ジャンプしたりしゃがんだりできるコントローラーを使用する単純な球体になります。
- 新しい球体(ゲームオブジェクト -> 3Dオブジェクト -> 球体)を作成し、その球体コライダーコンポーネントを削除します。
- 以前に作成した"RedMaterial"をそれに割り当てる
- 新しいGameObjectを作成し、それを呼び出します "Player"
- "Player"オブジェクト内の球を移動し、その位置を(0, 0, 0)に変更します。
- 新しいスクリプトを作成し、"SC_IRPlayer" という名前を付けて、その中に以下のコードを貼り付けます。
SC_IRPlayer.cs
using System.Collections;
using System.Collections.Generic;
using UnityEngine;

[RequireComponent(typeof(Rigidbody))]

public class SC_IRPlayer : MonoBehaviour
{
    public float gravity = 20.0f;
    public float jumpHeight = 2.5f;

    Rigidbody r;
    bool grounded = false;
    Vector3 defaultScale;
    bool crouch = false;

    // Start is called before the first frame update
    void Start()
    {
        r = GetComponent<Rigidbody>();
        r.constraints = RigidbodyConstraints.FreezePositionX | RigidbodyConstraints.FreezePositionZ;
        r.freezeRotation = true;
        r.useGravity = false;
        defaultScale = transform.localScale;
    }

    void Update()
    {
        // Jump
        if (Input.GetKeyDown(KeyCode.W) && grounded)
        {
            r.velocity = new Vector3(r.velocity.x, CalculateJumpVerticalSpeed(), r.velocity.z);
        }

        //Crouch
        crouch = Input.GetKey(KeyCode.S);
        if (crouch)
        {
            transform.localScale = Vector3.Lerp(transform.localScale, new Vector3(defaultScale.x, defaultScale.y * 0.4f, defaultScale.z), Time.deltaTime * 7);
        }
        else
        {
            transform.localScale = Vector3.Lerp(transform.localScale, defaultScale, Time.deltaTime * 7);
        }
    }

    // Update is called once per frame
    void FixedUpdate()
    {
        // We apply gravity manually for more tuning control
        r.AddForce(new Vector3(0, -gravity * r.mass, 0));

        grounded = false;
    }

    void OnCollisionStay()
    {
        grounded = true;
    }

    float CalculateJumpVerticalSpeed()
    {
        // From the jump height and gravity we deduce the upwards speed
        // for the character to reach at the apex.
        return Mathf.Sqrt(2 * jumpHeight * gravity);
    }

    void OnCollisionEnter(Collision collision)
    {
        if(collision.gameObject.tag == "Finish")
        {
            //print("GameOver!");
            SC_GroundGenerator.instance.gameOver = true;
        }
    }
}- SC_IRPlayer スクリプトを "Player" オブジェクトにアタッチします (Rigidbody という別のコンポーネントが追加されていることがわかります)
- "Player" オブジェクトに BoxCollider コンポーネントを追加します。
- "Player" オブジェクトを "StartPoint" オブジェクトの少し上、カメラの正面に配置します。
再生を押して、Wキーでジャンプし、Sキーでしゃがみます。目的は赤い障害物を避けることです。
この Horizon Bending Shader を確認してください。