Unity でプレイヤーをフォローする NPC を作成する
ノンプレイヤー キャラクターまたは NPC は、人間のプレイヤーによって制御されず、代わりにスクリプトまたは AI によって制御されるキャラクターです。
NPC がしなければならない最も一般的なタスクは、プレイヤーを追跡または追跡することです。
このチュートリアルでは、Unity のプレイヤーに従う NPC の作成方法を説明します。
ステップ 1: プレーヤー コントローラーを作成する
簡単なプレーヤー コントローラーを作成して、NPC を歩き回ってテストできるようにします。
- 新しいゲームオブジェクト ('GameObject' -> 'Create Empty') を作成し、名前を付けます "Player"
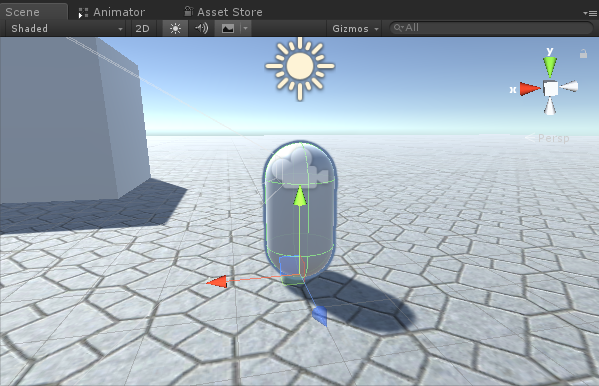
- 新しいカプセル ('GameObject' -> '3D Object' -> 'Capsule') を作成し、それを Player オブジェクト内に移動し、その位置を (0, 1, 0) に変更します。
- Capsule Collider コンポーネントをカプセルから削除する
- メイン カメラをプレーヤー オブジェクト内に移動し、その位置を (0, 1.64, 0) に変更します。
- という新しいスクリプトを作成し、'SC_CharacterController' という名前を付けて、その中に以下のコードを貼り付けます。
'SC_CharacterController.cs'
using UnityEngine;

[RequireComponent(typeof(CharacterController))]

public class SC_CharacterController : MonoBehaviour
{
    public float speed = 7.5f;
    public float jumpSpeed = 8.0f;
    public float gravity = 20.0f;
    public Camera playerCamera;
    public float lookSpeed = 2.0f;
    public float lookXLimit = 45.0f;

    CharacterController characterController;
    Vector3 moveDirection = Vector3.zero;
    Vector2 rotation = Vector2.zero;

    [HideInInspector]
    public bool canMove = true;

    void Start()
    {
        characterController = GetComponent<CharacterController>();
        rotation.y = transform.eulerAngles.y;
    }

    void Update()
    {
        if (characterController.isGrounded)
        {
            // We are grounded, so recalculate move direction based on axes
            Vector3 forward = transform.TransformDirection(Vector3.forward);
            Vector3 right = transform.TransformDirection(Vector3.right);
            float curSpeedX = speed * Input.GetAxis("Vertical");
            float curSpeedY = speed * Input.GetAxis("Horizontal");
            moveDirection = (forward * curSpeedX) + (right * curSpeedY);

            if (Input.GetButton("Jump"))
            {
                moveDirection.y = jumpSpeed;
            }
        }

        // Apply gravity. Gravity is multiplied by deltaTime twice (once here, and once below
        // when the moveDirection is multiplied by deltaTime). This is because gravity should be applied
        // as an acceleration (ms^-2)
        moveDirection.y -= gravity * Time.deltaTime;

        // Move the controller
        characterController.Move(moveDirection * Time.deltaTime);

        // Player and Camera rotation
        if (canMove)
        {
            rotation.y += Input.GetAxis("Mouse X") * lookSpeed;
            rotation.x += -Input.GetAxis("Mouse Y") * lookSpeed;
            rotation.x = Mathf.Clamp(rotation.x, -lookXLimit, lookXLimit);
            playerCamera.transform.localRotation = Quaternion.Euler(rotation.x, 0, 0);
            transform.eulerAngles = new Vector2(0, rotation.y);
        }
    }
}- に 'SC_CharacterController' スクリプトをプレーヤー オブジェクトにアタッチし、子メイン カメラをプレーヤー カメラ変数に割り当てます。
- Character Controller と呼ばれる別のコンポーネントが自動的に追加され、その中心位置が (0, 1, 0) に変更されていることがわかります。
ステップ 2: NPC を作成する
NPC を作成するには、次の手順に従います。
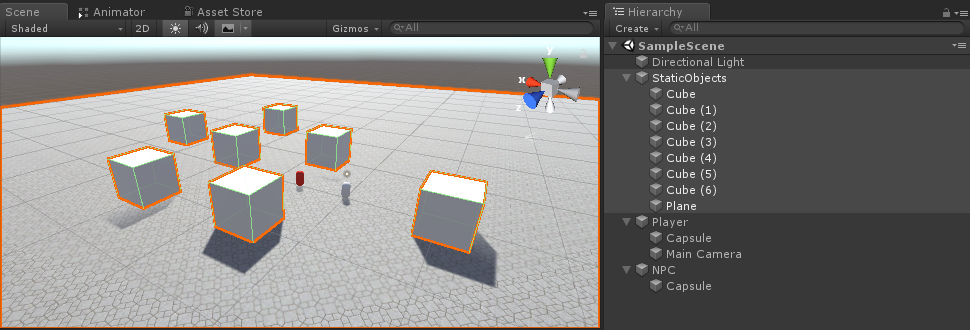
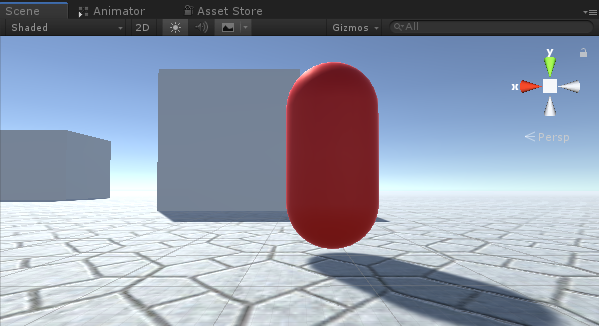
- 新しいゲームオブジェクトを作成し、「NPC」という名前を付けます。
- 新しいカプセルを作成し、NPC オブジェクト内に移動し、位置を (0, 1, 0) に変更します。
- 新しいマテリアルを作成して名前を付ける "npc_material"
- npc_materialの色を赤に変更します
- npc_material を NPC オブジェクト内の Capsule に割り当てます (これは、NPC とプレイヤーを区別できるようにするためです)
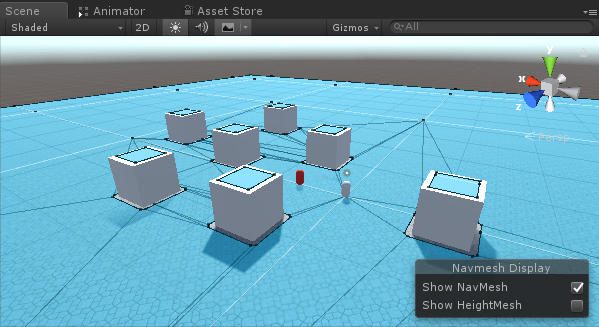
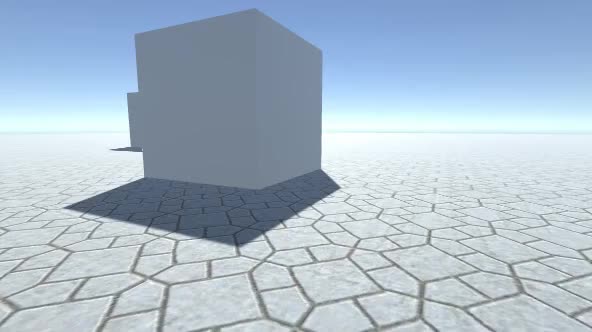
続行する前に、シーンで NavMesh をベイクする必要があります。
NavMesh は "Navigation Mesh" の略で、NPC が障害物にぶつからずにレベルを移動できるようにするための経路探索に使用されます。
NavMesh をベイクするには、次の手順に従います。
- シーン内のすべての静的オブジェクトをナビゲーション静的としてマークします
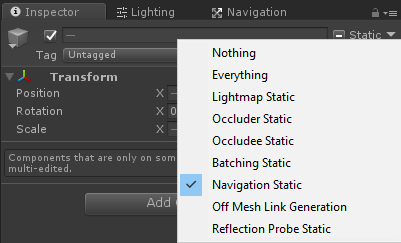
- ナビゲーション ウィンドウ (「ウィンドウ」 -> 'AI' -> 'Navigation') に移動し、「ベイク」タブを選択してから「ベイク」をクリックします
NavMesh がベイクされると、次のようになります。
ここで、NPC の動きのプログラミングに移ることができます。
- と 'NavMesh Agent' コンポーネントを NPC オブジェクトにアタッチします
- 新しいスクリプトを 作成し、名前を付けます 'SC_NPCFollow'
- と 'SC_NPCFollow' スクリプトを NPC オブジェクトにアタッチします
- 'SC_NPCFollow' スクリプトを開きます
まず、スクリプトの先頭に UnityEngine.AI 名前空間を追加することから始めます。
using UnityEngine.AI;次に、必要な変数を定義します。
    //Transform that NPC has to follow
    public Transform transformToFollow;
    //NavMesh Agent variable
    NavMeshAgent agent;
'void Start()' では、このオブジェクトにアタッチされた NavMesh Agent コンポーネントを取得することから始めます。
    // Start is called before the first frame update
    void Start()
    {
        agent = GetComponent<NavMeshAgent>();
    }
最後に、'void Update()' で、NavMesh エージェントにプレーヤーをフォローするように指示します。
    // Update is called once per frame
    void Update()
    {
        //Follow the player
        agent.destination = transformToFollow.position;
    }
最終的な 'SC_NPCFollow.cs' スクリプトは次のとおりです。
using UnityEngine;
using UnityEngine.AI;

public class SC_NPCFollow : MonoBehaviour
{
    //Transform that NPC has to follow
    public Transform transformToFollow;
    //NavMesh Agent variable
    NavMeshAgent agent;

    // Start is called before the first frame update
    void Start()
    {
        agent = GetComponent<NavMeshAgent>();
    }

    // Update is called once per frame
    void Update()
    {
        //Follow the player
        agent.destination = transformToFollow.position;
    }
}
いくつかの問題を修正:
問題 1: Play を押した後、NPC カプセルが地面の上に浮かんでいます。
解決策: NavMesh Agent の Base Offset 変数を負の値に変更します (私の場合は -0.08)。


問題 2: プレイヤーの後を追うと NPC が近づきすぎます:
解決策: NavMesh Agent の停止距離をより高い値に変更します (私の場合は 5 に設定しました)。

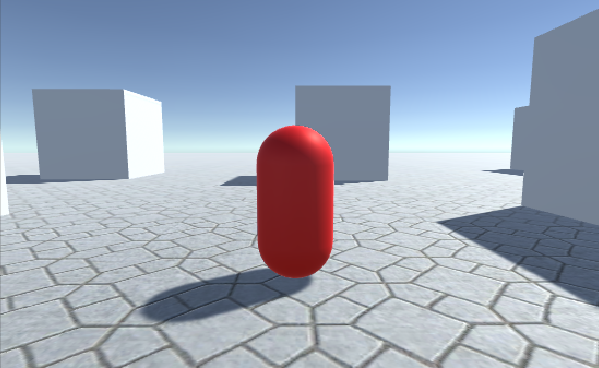
NPC の準備ができたので、テストしてみましょう。
すべてが期待どおりに機能し、NPC がプレーヤーを追跡し、設定された距離で停止します。