Unity のトップダウン プレーヤー コントローラー チュートリアル
FPS (一人称視点シューティング) や RTS (リアルタイム ストラテジー) などのゲーム ジャンルは多くの人に馴染みがありますが、特定のカテゴリに分類されないゲームも数多くあります。そのようなゲームの 1 つがトップダウン シューターです。
Top-Down Shooter は、プレイヤーがトップビューの視点から操作されるゲームです。
トップダウン シューティングゲームの例としては、ホットライン マイアミ、ホットライン マイアミ 2、オリジナルのグランド セフト オートなどがあります。
Unity でトップダウン キャラクター コントローラーを作成するには、次の手順に従います。
ステップ 1: スクリプトを作成する
このチュートリアルでは、スクリプトは 1 つだけ必要です。
- という新しいスクリプトを作成し、SC_TopDownController という名前を付け、そこからすべてを削除して、その中に以下のコードを貼り付けます。
SC_TopDownController.cs
using UnityEngine;

[RequireComponent(typeof(Rigidbody))]
[RequireComponent(typeof(CapsuleCollider))]

public class SC_TopDownController : MonoBehaviour
{
    //Player Camera variables
    public enum CameraDirection { x, z }
    public CameraDirection cameraDirection = CameraDirection.x;
    public float cameraHeight = 20f;
    public float cameraDistance = 7f;
    public Camera playerCamera;
    public GameObject targetIndicatorPrefab;
    //Player Controller variables
    public float speed = 5.0f;
    public float gravity = 14.0f;
    public float maxVelocityChange = 10.0f;
    public bool canJump = true;
    public float jumpHeight = 2.0f;
    //Private variables
    bool grounded = false;
    Rigidbody r;
    GameObject targetObject;
    //Mouse cursor Camera offset effect
    Vector2 playerPosOnScreen;
    Vector2 cursorPosition;
    Vector2 offsetVector;
    //Plane that represents imaginary floor that will be used to calculate Aim target position
    Plane surfacePlane = new Plane();

    void Awake()
    {
        r = GetComponent<Rigidbody>();
        r.freezeRotation = true;
        r.useGravity = false;

        //Instantiate aim target prefab
        if (targetIndicatorPrefab)
        {
            targetObject = Instantiate(targetIndicatorPrefab, Vector3.zero, Quaternion.identity) as GameObject;
        }

        //Hide the cursor
        Cursor.visible = false;
    }

    void FixedUpdate()
    {
        //Setup camera offset
        Vector3 cameraOffset = Vector3.zero;
        if (cameraDirection == CameraDirection.x)
        {
            cameraOffset = new Vector3(cameraDistance, cameraHeight, 0);
        }
        else if (cameraDirection == CameraDirection.z)
        {
            cameraOffset = new Vector3(0, cameraHeight, cameraDistance);
        }

        if (grounded)
        {
            Vector3 targetVelocity = Vector3.zero;
            // Calculate how fast we should be moving
            if (cameraDirection == CameraDirection.x)
            {
                targetVelocity = new Vector3(Input.GetAxis("Vertical") * (cameraDistance >= 0 ? -1 : 1), 0, Input.GetAxis("Horizontal") * (cameraDistance >= 0 ? 1 : -1));
            }
            else if (cameraDirection == CameraDirection.z)
            {
                targetVelocity = new Vector3(Input.GetAxis("Horizontal") * (cameraDistance >= 0 ? -1 : 1), 0, Input.GetAxis("Vertical") * (cameraDistance >= 0 ? -1 : 1));
            }
            targetVelocity *= speed;

            // Apply a force that attempts to reach our target velocity
            Vector3 velocity = r.velocity;
            Vector3 velocityChange = (targetVelocity - velocity);
            velocityChange.x = Mathf.Clamp(velocityChange.x, -maxVelocityChange, maxVelocityChange);
            velocityChange.z = Mathf.Clamp(velocityChange.z, -maxVelocityChange, maxVelocityChange);
            velocityChange.y = 0;
            r.AddForce(velocityChange, ForceMode.VelocityChange);

            // Jump
            if (canJump && Input.GetButton("Jump"))
            {
                r.velocity = new Vector3(velocity.x, CalculateJumpVerticalSpeed(), velocity.z);
            }
        }

        // We apply gravity manually for more tuning control
        r.AddForce(new Vector3(0, -gravity * r.mass, 0));

        grounded = false;

        //Mouse cursor offset effect
        playerPosOnScreen = playerCamera.WorldToViewportPoint(transform.position);
        cursorPosition = playerCamera.ScreenToViewportPoint(Input.mousePosition);
        offsetVector = cursorPosition - playerPosOnScreen;

        //Camera follow
        playerCamera.transform.position = Vector3.Lerp(playerCamera.transform.position, transform.position + cameraOffset, Time.deltaTime * 7.4f);
        playerCamera.transform.LookAt(transform.position + new Vector3(-offsetVector.y * 2, 0, offsetVector.x * 2));

        //Aim target position and rotation
        targetObject.transform.position = GetAimTargetPos();
        targetObject.transform.LookAt(new Vector3(transform.position.x, targetObject.transform.position.y, transform.position.z));

        //Player rotation
        transform.LookAt(new Vector3(targetObject.transform.position.x, transform.position.y, targetObject.transform.position.z));
    }

    Vector3 GetAimTargetPos()
    {
        //Update surface plane
        surfacePlane.SetNormalAndPosition(Vector3.up, transform.position);

        //Create a ray from the Mouse click position
        Ray ray = playerCamera.ScreenPointToRay(Input.mousePosition);

        //Initialise the enter variable
        float enter = 0.0f;

        if (surfacePlane.Raycast(ray, out enter))
        {
            //Get the point that is clicked
            Vector3 hitPoint = ray.GetPoint(enter);

            //Move your cube GameObject to the point where you clicked
            return hitPoint;
        }

        //No raycast hit, hide the aim target by moving it far away
        return new Vector3(-5000, -5000, -5000);
    }

    void OnCollisionStay()
    {
        grounded = true;
    }

    float CalculateJumpVerticalSpeed()
    {
        // From the jump height and gravity we deduce the upwards speed
        // for the character to reach at the apex.
        return Mathf.Sqrt(2 * jumpHeight * gravity);
    }
}![]()
ステップ 2: シェーダーを作成する
このチュートリアルでは、カスタム シェーダも必要です。これは、Aim ターゲットを残りのオブジェクトにオーバーレイする (常に一番上にある) ために必要です。
- プロジェクトビューを右クリック -> 作成 -> シェーダ -> 標準サーフェスシェーダ
- シェーダーに名前を付けます "Cursor"
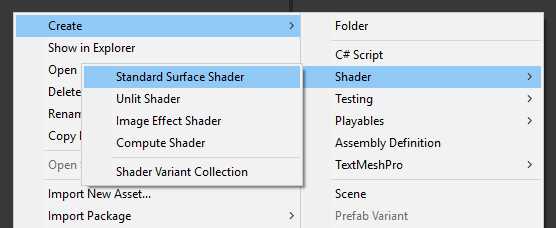
- シェーダーを開き、シェーダー内のすべてを削除して、以下のコードを貼り付けます。
カーソル.シェーダ
Shader "Custom/FX/Cursor" {
	Properties {
		_MainTex ("Base", 2D) = "white" {}
	}

	CGINCLUDE

		#include "UnityCG.cginc"

		sampler2D _MainTex;

		half4 _MainTex_ST;

		struct v2f {
			half4 pos : SV_POSITION;
			half2 uv : TEXCOORD0;
		};

		v2f vert(appdata_full v) {
			v2f o;

			o.pos = UnityObjectToClipPos (v.vertex);
			o.uv.xy = TRANSFORM_TEX(v.texcoord, _MainTex);

			return o;
		}

		fixed4 frag( v2f i ) : COLOR {
			return tex2D (_MainTex, i.uv.xy);
		}

	ENDCG

	SubShader {
		Tags { "RenderType" = "Transparent" "Queue" = "Transparent+100"}
		Cull Off
		Lighting Off
		ZWrite Off
		ZTest Always
		Fog { Mode Off }
		Blend SrcAlpha OneMinusSrcAlpha

	Pass {

		CGPROGRAM

		#pragma vertex vert
		#pragma fragment frag
		#pragma fragmentoption ARB_precision_hint_fastest

		ENDCG

		}

	}
	FallBack Off
}![]()
ステップ 3: トップダウン キャラクター コントローラーをセットアップする
トップダウンのキャラクター コントローラーをセットアップしましょう。
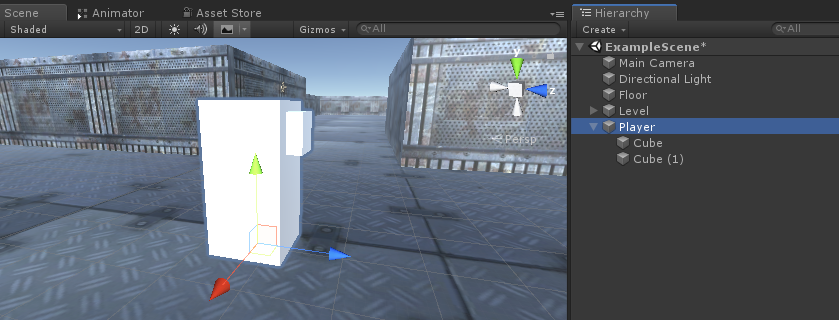
- 新しいゲームオブジェクトを作成して呼び出します "Player"
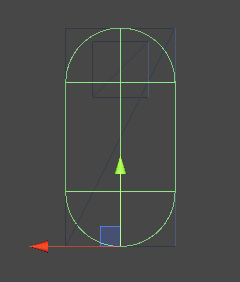
- 新しい Cube を作成してスケールします (私の場合、スケールは (1, 2, 1) です)
- 2 番目の Cube を作成し、はるかに小さくスケールして、上の領域に移動します (これは単にプレイヤーがどの方向を見ているかを知るためです)
- 両方の Cube を "Player" オブジェクト内に移動し、BoxCollider コンポーネントを削除します。
次に、先に進む前に、Aim ターゲット プレハブを作成しましょう。
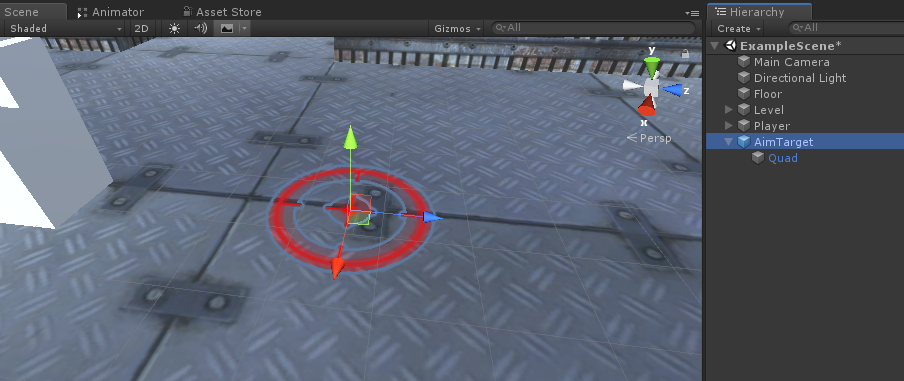
- 新しいゲームオブジェクトを作成して呼び出します "AimTarget"
- 新しいクアッド (ゲームオブジェクト -> 3D オブジェクト -> クアッド) を作成し、"AimTarget" オブジェクト内に移動します。
- 以下のテクスチャをクワッドに割り当て、マテリアル シェーダを次のように変更します。 'Custom/FX/Cursor'

- "AimTarget" をプレハブに保存し、シーンから削除します
![]()
Player インスタンスに戻ります。
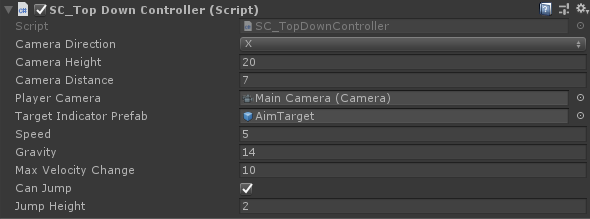
- SC_TopDownController スクリプトを "Player" オブジェクトにアタッチします (Rigidbody や CapsuleCollider などの追加コンポーネントが追加されていることがわかります)
- プレーヤーのモデルと一致するまで CapsuleCollider をスケールします (私の場合、高さは 2 に設定され、中心は (0, 1, 0) に設定されています)
- 最後に、SC_TopDownController に "Player Camera" 変数と "Target Indicator Prefab" 変数を割り当てます。
Player インスタンスの準備ができたので、テストしてみましょう。
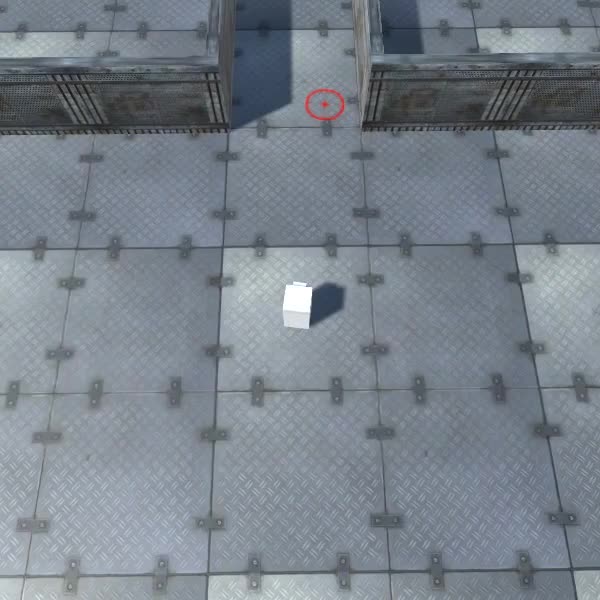
すべてが期待どおりに機能します。