Unity 用 3D ワーム コントローラー チュートリアル
このチュートリアルでは、TornadoTwins 初心者向けゲーム開発チュートリアル シリーズからインスピレーションを得た、Unity で簡単なワーム コントローラーを作成する方法を説明します。
ワーム コントローラーはスムーズな尾追従効果で滑り回り、ジャンプする機能もあります。
このチュートリアルのスクリプトは元々 JavaScript (別名 UnityScript) で書かれていましたが、現在はサポートされていないため、C# の代替を提供します。

Unity にワーム コントローラーを作成するには、次のものが必要です。
- 必要なスクリプトを作成する
- 虫のキャラクターを作成する
- キャラクターにスクリプトを割り当てる
ステップ 1: 必要なスクリプトをすべて作成する
まず、ワーム コントローラーのセットアップに必要なすべてのスクリプトを作成します。
- という新しいスクリプトを作成し、"SC_WormController" という名前を付けて、その中に以下のコードを貼り付けます。
SC_WormController.cs
using System.Collections;
using System.Collections.Generic;
using UnityEngine;

[RequireComponent(typeof(CharacterController))]
public class SC_WormController : MonoBehaviour
{
    public float speed = 3.0f;
    public float rotateSpeed = 1.0f;
    public float jumpSpeed = 5.0f;
    public float gravity = 9.8f;

    CharacterController controller;
    Vector3 moveDirection;

    // Start is called before the first frame update
    void Start()
    {
        controller = GetComponent<CharacterController>();
    }

    // Update is called once per frame
    void Update()
    {
        // Rotate around y - axis
        transform.Rotate(0, Input.GetAxis("Horizontal") * rotateSpeed, 0);

        // Move forward / backward
        Vector3 forward = transform.TransformDirection(Vector3.forward);
        float curSpeed = speed * Input.GetAxis("Vertical");
        float movementDirectionY = moveDirection.y;
        moveDirection = forward * curSpeed;

        // Jumping
        if (Input.GetButtonDown("Jump") && controller.isGrounded)
        {
            moveDirection.y = jumpSpeed;
        }
        else
        {
            moveDirection.y = movementDirectionY;
        }

        // Apply gravity. Gravity is multiplied by deltaTime twice (once here, and once below
        // when the moveDirection is multiplied by deltaTime). This is because gravity should be applied
        // as an acceleration (ms^-2)
        if (!controller.isGrounded)
        {
            moveDirection.y -= gravity * Time.deltaTime;
        }

        // Move the controller
        controller.Move(moveDirection * Time.deltaTime);
    }
}- 新しいスクリプトを作成し、"SC_CameraFollow" という名前を付け、その中に以下のコードを貼り付けます。
SC_カメラフォロー.cs
using System.Collections;
using System.Collections.Generic;
using UnityEngine;

public class SC_CameraFollow : MonoBehaviour
{
    /*
    This camera smoothers out rotation around the y-axis and height.
    Horizontal Distance to the target is always fixed.

    There are many different ways to smooth the rotation but doing it this way gives you a lot of control over how the camera behaves.

    For every of those smoothed values we calculate the wanted value and the current value.
    Then we smooth it using the Lerp function.
    Then we apply the smoothed values to the transform's position.
    */

    // The target we are following
    public Transform target;
    // The distance in the x-z plane to the target
    public float distance = 10.0f;
    // the height we want the camera to be above the target
    public float height = 5.0f;
    // How much we
    public float heightDamping = 2.0f;
    public float rotationDamping = 3.0f;

    void LateUpdate()
    {
        // Early out if we don't have a target
        if (!target)
            return;

        // Calculate the current rotation angles
        float wantedRotationAngle = target.eulerAngles.y;
        float wantedHeight = target.position.y + height;
        float currentRotationAngle = transform.eulerAngles.y;
        float currentHeight = transform.position.y;

        // Damp the rotation around the y-axis
        currentRotationAngle = Mathf.LerpAngle(currentRotationAngle, wantedRotationAngle, rotationDamping * Time.deltaTime);

        // Damp the height
        currentHeight = Mathf.Lerp(currentHeight, wantedHeight, heightDamping * Time.deltaTime);

        // Convert the angle into a rotation
        Quaternion currentRotation = Quaternion.Euler(0, currentRotationAngle, 0);

        // Set the position of the camera on the x-z plane to:
        // distance meters behind the target
        transform.position = target.position;
        transform.position -= currentRotation * Vector3.forward * distance;

        // Set the height of the camera
        transform.position = new Vector3(transform.position.x, currentHeight, transform.position.z);

        // Always look at the target
        transform.LookAt(target);
    }
}- という新しいスクリプトを作成し、"SC_SmoothFollow" という名前を付けて、その中に以下のコードを貼り付けます。
SC_SmoothFollow.cs
using System.Collections;
using System.Collections.Generic;
using UnityEngine;

public class SC_SmoothFollow : MonoBehaviour
{
    // The target we are following
    public Transform target;
    // The distance in the x-z plane to the target
    public float distance = 10.0f;
    // the height we want the camera to be above the target
    public float height = 5.0f;
    // How much we
    public float heightDamping = 2.0f;
    public float rotationDamping = 3.0f;

    // Start is called before the first frame update
    void Start()
    {
        if (!target) return;

        transform.LookAt(target);
    }

    void LateUpdate()
    {
        // Early out if we don't have a target
        if (!target) return;

        // Calculate the current rotation angles
        float wantedRotationAngle = target.eulerAngles.y;
        float wantedHeight = target.position.y + height;

        float currentRotationAngle = transform.eulerAngles.y;
        float currentHeight = transform.position.y;

        // Damp the rotation around the y-axis
        currentRotationAngle = Mathf.LerpAngle(currentRotationAngle, wantedRotationAngle, rotationDamping * Time.deltaTime);

        // Damp the height
        currentHeight = Mathf.Lerp(currentHeight, wantedHeight, heightDamping * Time.deltaTime);

        // Convert the angle into a rotation
        var currentRotation = Quaternion.Euler(0, currentRotationAngle, 0);

        // Set the position of the camera on the x-z plane to:
        // distance meters behind the target
        transform.position = target.position;
        transform.position -= currentRotation * Vector3.forward * distance;

        // Set the height of the camera
        transform.position = new Vector3(transform.position.x, currentHeight, transform.position.z);

        // Always look at the target
        transform.LookAt(target);
    }
}
ステップ 2: ワーム キャラクターを作成する
次のステップは、ワーム キャラクターを作成することです。
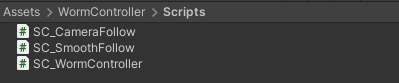
- 新しい球体を作成し (ゲームオブジェクト -> 3D オブジェクト -> 球体)、その位置を (0, 0, 0) に変更し、その SphereCollider コンポーネントを削除して、名前を次のように変更します。 "Worm"
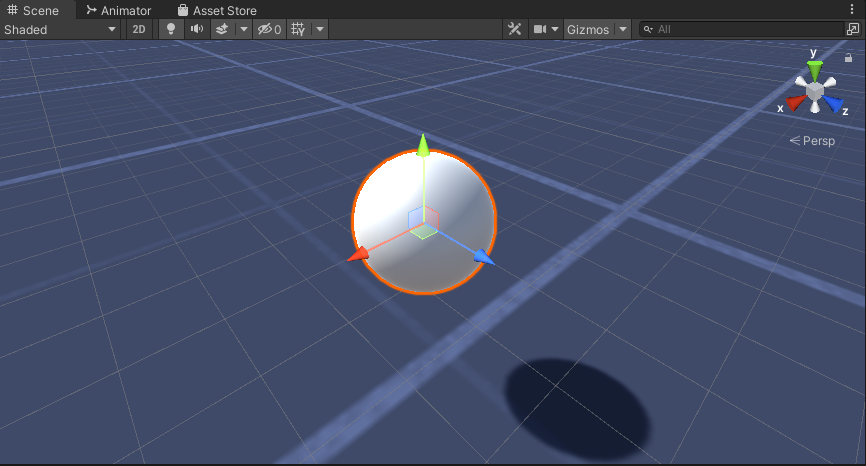
- "Worm" 球を複製し、名前を "BodyPart1" に変更し、位置を (0, -0.1, -0.9) に変更し、スケールを (0.8, 0.8, 0.8) に変更します。
- "Worm" 球を再度複製し、名前を "BodyPart2" に変更し、位置を (0, -0.2, -1.6) に変更し、スケールを (0.6, 0.6, 0.6) に変更します。
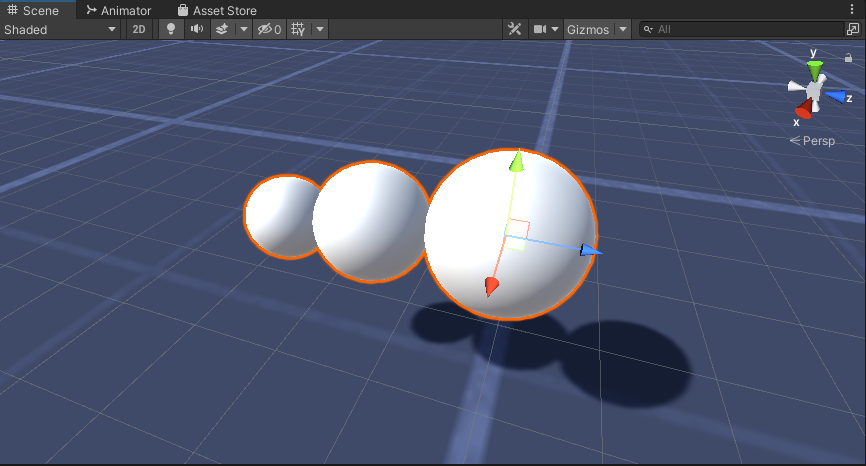
- "Worm" オブジェクトを右クリック -> [空の作成] を選択し、新しく作成したオブジェクトの名前を に変更します。 "Eyes"
- "BodyPart2" 球を複製し、名前を "Eye" に変更して、"Eyes" オブジェクト内に移動し、位置を (-0.24, 0.353, 0.324) に変更し、スケールを (0.4, 0.4, 0.4) に変更します。
- "Eye" 球を複製し、その X 位置を 0.24 に変更します。
- ビジュアライゼーションのために、体には緑、目には青など、いくつかのマテリアルを作成できます。
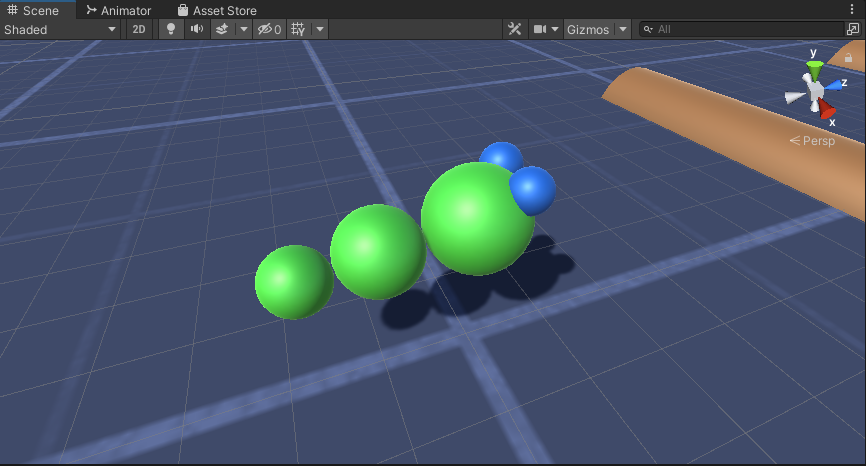
ワームキャラクターの準備ができました。
ステップ 3: ワーム コントローラーをセットアップする
最後のステップは、スクリプトを割り当てることです。
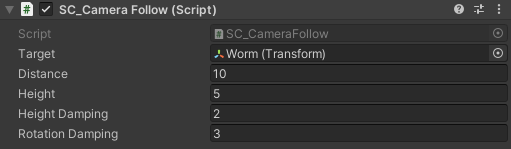
- SC_CameraFollow スクリプトを Main Camera オブジェクトにアタッチし、"Worm" Sphere をターゲット変数に割り当てます。
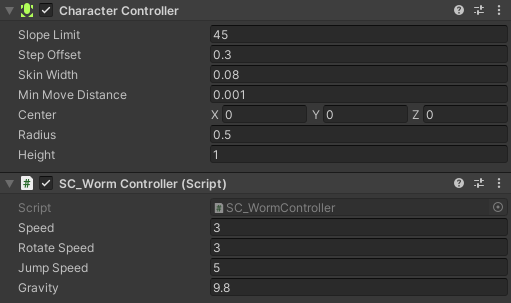
- SC_WormController スクリプトを "Worm" 球にアタッチします (CharacterController と呼ばれる別のコンポーネントが自動的に追加されます)。
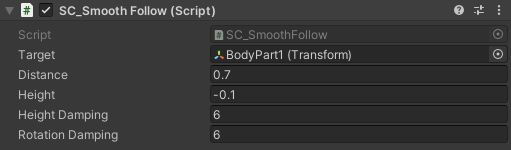
- SC_SmoothFollow スクリプトを "BodyPart1" 球にアタッチし、その値を以下の スクリーンショット と同じに設定します。
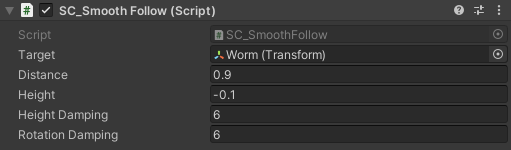
- SC_SmoothFollow スクリプトを "BodyPart2" 球にアタッチし、その値を以下の スクリーンショット と同じに設定します。
これでコントローラーの準備が整いました。W、A、S、D を使用して移動し、Space を使用してジャンプします。
ソース Unity パッケージは以下から入手できます。